8 Amazing Web Design Ideas to Engage Visitors

Web Design Ideas

Website user engagement is a crucial indicator determining the success and ranking of your site. Every website is competing with rival brands to extend its engagement levels. Even if you attract an enormous amount of traffic, this won’t mean much unless you’re ready to engage visitors. But also obtain them to perform the specified action.

You want your website to be aesthetically pleasing enough to ask them in and an appealing web design helps you do that. So we’ve gathered some great web design inspiration to start you off on the proper step and obtain those web design ideas flowing.

But there’s quite just that to effective web design. Let’s re-evaluate the fundamentals for what makes an honest website before we glance at some brilliant website design ideas.

1. Reduce Page Load Time

You’ve also may have had an experience with slow-loading pages yourself. You find an internet site that appears interesting. Then you click on the link only to be kept expecting it to load. You likely exit the web site because it’s frustrating to attend and wait. A study conducted found that pages loading only one second slower can experience a 56% increase in their bounce rate. That spells trouble for website user engagement.

2. Matching your Brand Identity

Your website plays a key part in building a uniform brand identity. Your logo, tagline, branded imagery and values should be obvious through the messaging of each page of the web site. Accumulatively, your site should clearly answer “who” and “what” your brand is/does in order that visitors catch on within seconds!

3. Attract your Audience

The most important a part of building a brand and website is keeping your audience in mind. All design choices got to answer how you’ll best serve them. Also make a positive, memorable and unique experience for them. Without this, you won’t be ready to get up next to competitors. Use language and imagery which will appeal to them and reflect values they will relate to.

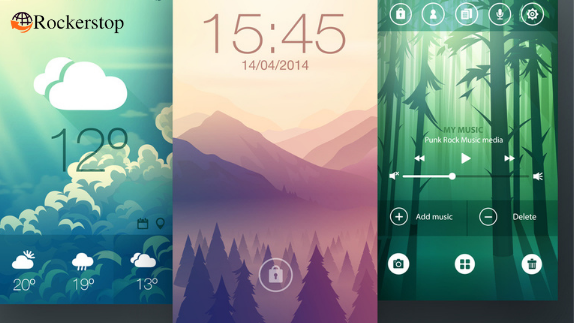
4. Comfortable With Color

A lovely thanks to welcome your website visitors and invite them to remain for a short time is to use color schemes that are easy on the eyes, like neutrals or pastels, which naturally influence calm and relaxation. Natural greens, pastel blues, , light pinks, and cool greys, are among those colors that are less vibrating to interact with than the contrast of pure black or pure white.

A neutral background allows a brighter or contrasting foreground to face out, softly. It draws your users’ attention to the bits you would like it to (so your branded visuals or products etc.) whilst guiding them towards call-to-actions and other buttons.

5. Thinking Abstractly

Getting creative with geometric patterns and abstract shapes may be a great alternative to using photography in digital design. Depending on the industry your business is in, it’s the potential to divert faraway from your competitors and avoid predictable layouts and stock imagery.

Abstract motifs, expressed in various forms throughout the location , build an overall mood for your website and brand. Such designs bring focus to your main product or CTAs, balance in multi-product gallery layouts and establish an authentic brand identity able to connect together with your audience emotionally.
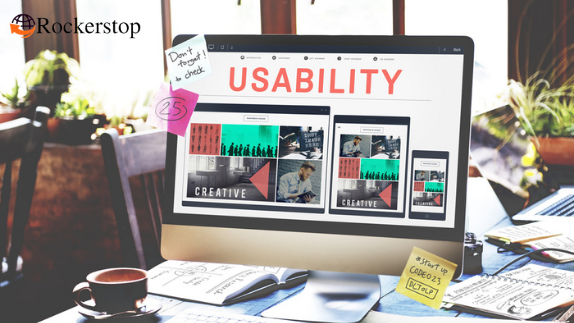
6. Easy Navigation

Technically, your website homepage features your latest product provider or organization’s mission statement, but what if the navigation menu was the best event? Using the navigation menu is nearly always a subsequent step for each customer, so why not turn your menu into a visible attraction!

Easy navigation through your website, while being more visually interesting, creates a far better user experience for your users. Don’t forget to include the proper elements of your brand identity, say your chosen colors and fonts. This is a singular strategy for ecommerce businesses and a fun option for artist portfolios or organizations with a couple of specific CTA’s.

7. Suitable Typographic / Fonts

Let the text do the chat with type-heavy designs. The variety lies in font selection, size, color and fonts layout. The design is often simple but the benefit is that it gives focus to your message.

You can go with text-heavy web design. If your brand is fragile, understated or calming, consider a minimalist approach of sans-serif fonts that are thin or flowing with many spaces between elements to allow them to breathe, stripping away the non-essential elements.

8. Animations

Recently, technological advancements and a slow shift faraway from strict minimalism has directed brands to explore digital design through a more interactive approach. From sharp animations to flowing page transitions, to an almost overwhelming layering of media and motion, this movement aims to rid web design of any “static” feeling.

One of the ways to incorporate animations is by providing visual feedback to the user’s interaction together with your site. Scrolling is one among the foremost subtle sorts of interaction, and intrinsically , web designers are finding unique ways to spice up the visual feedback users get, from multidirectional page transitions to animated illustrations.

If you’re trying to find something even more innovative, inspect parallax animations. With web animation designers’ ability to separate page elements into foreground and background extremes, they will create a parallax effect: the optical phenomenon during which objects almost the viewer appear to maneuver faster than objects farther away.

These web design ideas provide an excellent tool for ecommerce sites who want to point out the features of multiple products, guiding users from galleries to individual product views. It’s also a very fun strategy for educational websites hoping to draw in kids onto their site.

If you’re performing on a replacement website, we hope you’ll use this web design inspiration as your start line . Once you recognize which of the above aesthetics fits your business, these website design ideas can point you within the right direction. Before you recognize it, you’ll be making connections with clients and customers from all across the internet!

Also Read 5 Principles for Ethical Designs

Top App Design Trends for 2021

6 Top App Design Trends

Your app’s not modern unless it looks modern. That’s why it’s so important to stay tabs on the most well-liked app design trends, including what’s the future for 2021.

Did you recognize, 80% of the users are using mobile phones to travel to the web platform?

This clearly shows growth of the mobile App Market.

Today, technology is getting smarter quickly. And many companies are becoming on this fast train by leveraging mobile technology and innovations. The importance of mobile app developers is rapidly increasing every day. They’re taking everyone’s attention for their coding skills & invention and constantly coming up with new app design ideas.

The trending designs make them more attractive and make users think – let’s give it a try!

This year we’ll see a number of the foremost popular app design trends make a comeback whereas some fresh design trends would unlock new possibilities for developers, designers and users.

Let’s Start Exploring trends of mobile app design trends 2021

1. Neumorphism


Icons and buttons became extremely simplistic within the past years. In 2021, designers are getting to make them more interesting. How are they going to achieve that?

The answer is named “neumorphism,” short for “new skeumorphism.” This hot new app design trend takes the design from the first 2010s and provides it a 2020s makeover—same concept of using real-life images, but with new and updated 3D-like graphics.

Neumorphism basically takes flat icons and buttons and offers them a lush dimensional makeover. It still keeps much of flat design’s cartoonish simplicity, but with an eye-popping realism that makes it jump from the screen. Not quite photorealistic, but tons more life-like and tactile.

2. Visuals for Artistic Touch

App design shouldn’t just be beautiful, it should even be a joy to use. Nowadays, with numerous folks glued to our phones and watching screens all day long, this is often truer than ever. App designers are sensing users’ desire for an easier viewing experience that reduces eye strain, creating easily comprehensive designs paired with soothing colours and visuals that are easy on the eyes.

These app designs use soothing, natural colors and straightforward layouts that don’t overwhelm users, enabling them to seem at the screen for extended periods without getting uncomfortable.

3. Delightful Swiping Experiences

Swiping has always been one among mobile’s greatest advantages over desktop. Although clicking is quick-and-easy, swiping is simply much more… fun! App design trends in 2021 encourage playing thereto advantage by making swiping more interesting, engaging and memorable.

There are so many non-identical approaches to enhancing your swipe experience, so your only restriction is your imagination. This can be as fundamental as adding an animation to your swipes that provides users a more satisfactory “turning the page” experience, or something more deeply rooted within the functionality of your app to streamline user tasks.

4. Depth through shadows and layering

If you can’t make a graphic begin on the screen, try pushing everything else back. One way to realize the powerful depth effect that’s popular in app design immediately is through techniques like shadows and layering.

This app design trend isn’t about subtlety. Designers are going beat on bold, dark shadows.

Adding strong shadows and contrast to photography, graphics and other design elements could also be a quick-and-easy shortcut to visual depth. An equally effective technique is to layer your elements, with parts overlapping one another to make an indoor hierarchy. What’s more, you’ll add shadows to your layers to reinforce the effect, adding an entire new dimension to your app.

5. Unexpected Angles

Gone are the times of apps with nothing but right angles. In 2021, app designers are developing things more fascinating by incorporating unusual angles into their designs. Whether it’s design elements fixed at an angle that don’t follow the quality right angle rules, this app design trend is making users’ eyes in new directions.

Designers are actually and figuratively breaking from the confines of tradition to face out. Unexpected angles put interest and develop app designs more dynamic. The results an app design trend that feels explorative, playful and a touch bit rebellious.

6. Innovative Data Visualization


After years of being bored in math class, the recognition behind the info visualization trend results in one conclusion: graphs don’t need to be boring.

Whether you’re designing an app around data presentation or simply have some figures you would like to speak about during a fun way, data visualization can add a touch of creativity to your analytics. Using unique sorts of graphs, animations and colours in correlation to your data can make it more stimulating and supply users with information during a more engaging way. For example, wave patterns are a well-liked choice as they create a desirable hypnotic effect that’s a pleasure to observe.

5. Analogue Inspiration

The rule for app designs wants to be the more modern the higher. In 2021 however, we’ll be watching app designers going against the bringing analogue inspiration return to their app designs. These apps integrate design elements a bit like the analogue world: paper and cardboard textures, collage inspired layouts, retro typography and button designs.

We’re seeing app designs within the sort of newspapers and magazines also as old-fashioned calculators and board games, giving high tech apps a well-known and approachable vibe.

The beauty of this app design trend is that the warm and cosy experience this style invokes. It’s all about making apps feel more realistic, homely and satisfyingly tangible.

6. Inclusion of Augmented Reality (AR) & Virtual Reality (VR)

AR & VR designs are another latest UI design trend getting well known between developers. The reason is the increasing scope of features which will be included in modern applications. Devices are powerful now, networks are faster, & all of these elements have opened new possibilities.

Users are liking AR/VR applications & games more because of their interactive features. AR/VR has ended the borderline between the real world & the imaginary world, which is what people are fascinated by.

Closure

The app design trends of 2021 all follow the shared goal of creating app usage easier, engaging and pleasurable. Apps aren’t simply tools anymore; they’re developed into pocket-sized partners that we desire to spend time with. App designers understand this tendency and skills to make sure that the app designs of 2021 aren’t only easy to use but also enticing and fun. We can’t wait to ascertain what else they are available up with!

Also Read Blog 5 Principles for Ethical Designs

5 Principles for Ethical Designs

5 Ethical Principles for Designers

Design ethics concerns moral behaviour and responsible choices within the practice of design. It guides how designers work with customers, colleagues, and therefore the end users of products. How they conduct the planning process, how they determine the features of products, and how they evaluate the moral consequence or moral worth of the products that result from the activity of designing.

Ethical considerations have played a vital role in designing. However the event of knowledge domain and technology has deepened awareness of the moral dimensions of design.

In other words, ethical design is about the “goodness”—in terms of convenience to individuals, society, and therefore the world—of how we get together, how we practice our work, and what we create.

It’s important for designers to know the impact they need and therefore the steps they will fancy to make products. A design must be that are good for your users, good for business and good for society. In this article we’ll break it all down, describe the most principles of ethical design, show you examples to re-evaluate some ways to work toward more ethical designs.

5 Principles for Ethical Designs

Ideally, as a designer you’d want to require responsibility for your ethical efforts, but that responsibility often gets to others.

Let’s go over some basic principles of ethical design

1. Usability

Nowadays usability has conquered a spot as a basic requirement for every interface; unusable products are considered design failures. And rightly so; we’ve an ethical commitment as designers to make products that are instinctive, safe, and free from possibly life-threatening errors.

five core components of usability are Learnability, efficiency, Memorability, Satisfaction, errors

Learnability

Learnability is how easy your product is to find out.

Efficiency

How quickly can users perform tasks?

Memorability

Memory is both knowledge within the head and knowledge within the world. An effective design will reduce the user’s memory burden by making objects, actions, and options available.

Satisfaction

Satisfaction is tough to quantify because it takes many factors under consideration. Many companies plan to measure satisfaction from usability testing or ask their users to finish a Satisfaction Survey.

Errors

How many errors do users make and the way severe are these errors?

2. Accessibility

Like usability, inclusive design has become a typical item within the requirement list of the many designers and corporations. Accessible design benefits all, because it attempts to hide as many needs and capabilities as possible. There is assistive technology for those with vision impairment to use the web. However there are frequent web design flaws that resist accessibility. Accessible design benefits all!

3. Privacy

Privacy issues are always a trending topic with digital design. As Alexa taking note of our conversations, Google monitoring our clicks and Facebook reading our private messages. The top ethical design practice would be to develop designs that only gather personal information that’s within the best interest of the users.

For example, Signal may be a secure phone and messenger app specifically designed to guard its user’s privacy. When you check in, it doesn’t invite anything but your telephone number because that’s all that’s necessary to start out using the app. With increasing awareness and concern about privacy this leads to targeted advertising and data-driven businesses. There has been backlash and more users are seeking out brands that respect our right to privacy.

4. User Involvement

Ultimately, the designer is designing for the user. Doesn’t it add up to incorporate users in design decisions, from users’ needs and concepts . Your design will become a neighborhood of their life, and ideally that becomes a positive experience.

The most effective ways of studying user involvement is holding small groups of user testing which can show you where the issues lie, then you’ll revise the planning and test again. And again. And again!

5. Sustainability

What will be the impact of our work on the world’s environment, resources, and climate? Instead of continuously adding new features within the unrelenting scrum treadmill, how could we design for fewer? We’re within the position to make responsible digital solutions that enable sustainable consumer behaviour and stop overconsumption.

Climate change may be a global issue and it’s time that we as designers consider the impact of our work on the world’s environment, resources and climate. An excellent example of an ethical design trend embracing sustainability is circular design which uses a closed-loop system design strategy where resources are continuously repurposed.

Rather than creating products and services that have a linear lifecycle with a beginning, a middle and an end, the aim is to style products that are continuously cycled in various forms, following a reuse and recycle loop leading to less waste. Many companies are embracing circular design, like 57st. design who make modular furniture, AMP Robotics who program simpler recycling robots, and PlasticRoad which recycles plastic into modular road-building blocks.

Closure –

By applying ethics daily and structurally in our design process, we’ll be ready to identify and neutralize during a very early stage the potential for mistakes and misuse.

We’ll increase the standard of our design and our practices just because we’ll think things through more thoroughly, during a more conscious and structured manner.

But perhaps most vital is that we’ll establish a replacement standard for design.

A standard that we will sell out to our customers because the way design should be done with ethical design principles and processes already mentioned. A standard which will be taught to style students in order that the most recent generation of designers doesn’t know any better than to use ethics, always.

Should I Take My Own Name as a Domain Name?

Pros and Cons of of using your Own Name as a Domain Name

Should I take my very own name as a domain name or should I use an ingenious name? Do not worry, because you are not alone in this confusion, this question comes to mind to many people when they think of buying a domain.

A domain name gives your business quick credibility and puts you within the same online marketplace as your biggest competitors. It says that you simply mean business and helps internet buyers and customers see you as a forward-thinking company that’s conveniently accessible online.

In this blog we will be discussing advantages and disadvantages of choosing a domain name as your own name. Let us check out both aspects then we’ll come to the conclusions.

Advantages of Using your Own Name as a website Name

Personal Branding:

When it involves personal branding, having your own name is often an excellent resource. When you meet someone at a conference or an occasion, don’t you tend to recollect their name, instead of their business name?

Its When people recall you, talk about you, recommend you, or refer you to others, they are more likely to use your name. Because it’s generally more memorable and easier to recollect.

The most suitable reason for using your own name as a business or name would be because you’re trying to brand yourself as an expert in your field. Having your name as a business name lets people know that you simply are confident in your pursuits and need to be recognized as a topic matter expert in your niche. People wish to connect with people, and zip beats when the author of an internet site is ahead.

Personal domains aren’t only for personal use. They can accommodate many aspects of your business life. Your domain could include examples of your work and a link to your LinkedIn profile.

Ideal for Portfolio / Resume website:

When you build your portfolio or resume website, it is sensible to use your own. Indeed, many freelance authors, designers, and digital marketers like better to use their name for an equivalent purpose. It also sometimes satisfies the need for branding and attracts more clients to their freelance business.

Your portfolio website is all about making a robust foremost impression. Before anyone gets there though, they’ll first have to click on a website name or type one into their address bar. A domain name is one of the foremost introductions people have to you and your work.

For your portfolio website to succeed, your domain can pay an enormous role in it. It’ll define your brand, provide the primary impression to first-time visitors, and also help in your SEO ranking.

It’s Easily Available:

I can tell you repeatedly, many times I’ve thought of the foremost brilliant business name, only to seek out that it’s already been taken. With over 294 million domain names already been snatched up, finding a business name that hasn’t already been taken is really a tough job. BUT, if your personal name is exclusive enough there’s an honest chance that you simply are going to be ready to use that as your name AND social media account names, which is great for branding.

Easy to Change Business Direction:

If you begin off in business by offering a service, on the other hand plan to switch to something else, you’ll make that transition quite easily if you employ your name as your domain name.

Generally speaking, you’ll take your name in whichever business direction you want to! It’s certainly more flexible than a business name or a keyword-rich domain name.

So, if you would like the pliability to vary direction or course-correct in business, pick your own name. That gives you the space to check a couple of things out without feeling too restrained.

Cons of Using your Own Name as a Domain Name

It makes your website harder to sell:

If you’re a private brand using your own name as your domain, you would possibly struggle to seek out a buyer for your website. That’s if you ever decide to sell it.

Unless you discover somebody else with the precise same name and offers an equivalent service, it’s going to be trickier to sell your website on.

This one is big. When deciding what to call your business…you probably aren’t brooding about how your business goes to finish. But the actual truth is if you take your name as your business and domain name it may be hard to sell, by chance you ever want to cash out of your business.

Sometimes it makes hard to work out what you do:

Another reason why you may decide against choosing your own name as your website domain name is that your name doesn’t instantly tell people what you do and how you help.

If we had used brainluth.com or Lyncyackles.com for our website, for instance, it’d be tons harder for our clients to figure out what it’s we do!

Your name may be hard to spell:

If people struggle to mention or spell your name (like in our case with Martin luther!) you’ll be reluctant to use your own name as your name.

No Doubt, if you have a good comfortable name that everybody can easily spell out, then it’s a different story altogether!

Conclusion:

If your motive is clearly personal branding and does not intend to sell out your website, then using your own name is just fine. If you’re ever thinking of adjusting the structure of your business, you’ll find the transition harder if you’ve used your name as your name.

Or If your goal is to establish a business and you might consider selling it in the future, using a creative name is the best approach.

So, these were the pros and cons of Using Your Own Name as your Domain Name. Do let me know your opinion in comment below

10 Tips to Create Banner Ad Design for more Clicks

Tips for Banner Ad Design

Web banner design is among the leading sorts of marketing utilized in today’s online world and comes altogether shapes and sizes. Web banner design is all about creating the elite clickable banner ads possible.

Banner ads are advertisement images puts on sites that showcase a product or brand and link to the advertiser’s website. Most of the companies use banner Ads in one form or another because they’re a reasonable, measurable and effective medium to extend brand awareness.

If you’re desiring to boost your online traffic with banner ads, you will be asking yourself: how am I creating web banner ad design that people will want to click on? Web banner design centralizes the organized creation of fruitful banner ads through the basic design guidelines. In this article we’ve put together all the knowledge you would like to make successful web banner designs.

10 Tips for Banner Ad Design

1. Banner Sizes

According to Google Adsense, standard banner sizes are:

728×90px — Leaderboard

300×600px — Half Page

300×250px — Medium Rectangle

336×280px — Large Rectangle

2. Simple is Good

Keep content and visuals simple. Viewers are probably only getting to glance at your web banner ad for a second.

3. Use Buttons Properly

Depending on the type of banner, buttons will frequently increase the click-through rate (CTR) of your ad. If you’re using them, place after your copy on the lower right side in contrasting colours. Always keep them steady throughout the set of ads.

4. Place your banner ads correctly

Buy space on an internet site where your design is going to be featured above the fold and shut to the most content of a page.

5. Readable Text

Make your headline and body copy different sizes. All copies should be four lines or less.

6. Use Relevant image

Select relevant graphics and photos that enhance your message and are straight related to your product. No abstract concepts here.

Can’t afford professional photography or supermodels? Buy an affordable license for a stock photo. There are many top-quality ones out there. Better still, choose original illustrations or graphics created by a designer.

Keep in mind, it’s not always necessary to take images in your banner ads. Nice typography can also create equally effective results.

7. Choose perfectly suitable colors

Each and every color features a different alliance, and it’s important to think about what type of emotions you would like to evoke in your audience. Colors are going to be the primary thing a user notices in your banner ad. Colors are also subjective and have different associations in several cultures. Make sure to review your audience when making your color selections. 

8. Use the correct file formats

JPG, PNG, GIF or HTML5 files are going to be your working deliverables. Your designer will usually use Adobe Illustrator or Photoshop to give JPG, PNG, or GIF files, or in Google Web Designer or Adobe Animate for HTML5 files. Remember, Flash ads are just about out of date at now , so choose these other image file formats.

9. Maintain sequence

Banner ad design relies upon the proper balance within each ad, so watch your hierarchy. Effective banner ads are designed to extend brand awareness and drive traffic to your website. 

Your company logo must be there to create brand awareness.

The value proposition showcases the service/product you provide and calls attention to itself with attractive offers and costs. Think words like: “High quality” or “50% off” or “Limited time offer.” this could take up the best space in your ad and will be the primary thing that viewers’ eyes see.

The call to action also called CTA is the text or button that invites users to click. Best examples of Phrases are “Know more” or ‘” Get started” or “Visit Now”. This should be a transparent focus of the ad.

10. Have a clearly defined frame

People’s eyes are usually drawn to a topic inside a frame. Productive banner ads definitely have a clearly defined frame with graphics extended to the sides of the box. 

These are just a few banner ad design guidelines, but it takes tons more to make truly awesome, high-performing ads. If you’re not a knowledgeable designer (or too busy running a business), consider hiring a talented creative to style the right , clickable ads only for you.

How to Build Brand Awareness

Seven Ways to Build Brand Awareness

Brand awareness can seem like an abstract concept. How does one make people conscious of your brand? What makes a brand stick call at people’s minds? Shouldn’t the product just speak for itself? How can a brand actually convince customers that their product is the best option?

Several well-established companies have created ongoing, memorable brand awareness campaigns. Once a brand is taken into account “established,” that doesn’t mean the brand awareness efforts stop. In fact, it means the opposite—the world has expectations for that brand, and for the brand to remain relevant, they have to stay meeting those expectations.

Brand awareness is significant because it helps audiences understand, recall, and become comfortable alongside your branding and products. If you’ll build brand awareness among your target audience, you’ll help your brand become top-of-mind when these consumers are able to research and make a sale.

Brand awareness isn’t a one-stop shop, it’s a constantly evolving process to succeed in new people, tell the brand story and build an enduring relationship.

Seven ways to build brand awareness-

1. Blogging:

Blogging is often an entire game changer when it involves creating brand awareness.

People attend the web to ascertain what the experts say on a spread of topics. Blogging—whether it’s on your own website or as a guest blogger—enables you to be that expert that folks are trying to find.

In blog posts, you’ll share thoughts, ideas and background to not only provide context, but show careful thought and consideration for a reader when you’re answering the questions they need. Positioning yourself as an expert in your industry creates trust and teaches people to associate authority and value together with your brand. Blogging not only attracts curious web surfers, but also builds up SEO, program optimization, which suggests your website will rank higher on Google and other search engines…which only increases your brand awareness.

2. Creating Infographics:

One of the foremost shareable content formats out there’s the infographic. Infographics are visually engaging, easy to consume, and more fun to read than a daily article. Study says that the brain processes visuals 60,000 times faster than plain text and 94% of blog posts with visuals get more engagement.

Videos are a strong tool to convey emotion and humanize a brand. Engagement is straightforward to trace with videos, comments, retweets, posts etc. Done well, with thoughtful core values at its roots, can change the narrative from just selling a product to far more.

3. Use Native Advertising:

You’ve seen them before: as you scroll through Instagram or Facebook, you see a stimulating post. To take a glance and realize, it’s not from one among your friends—it’s from a brand, and it’s actually Ads. You’re engaging with a native ad.

Native advertising is ads that look almost like user-created content. You’ll see them on Pinterest, Buzzfeed and Facebook, both in your feed and once you search specific tags. It seems quite tricky, but is extremely effective.

4. Partnerships:

Pairing up with other companies is often an interdependent marketing strategy. It makes it easy to succeed in more people and when marketed correctly, can really get people excited around it.

5. Offer Freemium:

Offering a freemium option allows customers to urge a taste of your brand and merchandise before making a sale. It’s a try-before-you-buy opportunity which will, technically, last forever.

It’s common to supply a freemium option with the condition that the brand’s watermark is going to be shown on any public-facing parts of the merchandise or service. This makes freemium a win-win situation: the buyer gets the merchandise for free of charge, and therefore the brand gets free advertising when consumers use it.

6. Hashtags and Follower Engagement:

They seem really simple, but are an excellent cataloguing technique which will cause high engagement rates when they’re done right: hashtags!

Hashtags are powerful and contagious! The secrets to an excellent crowdsourcing and hashtag campaign are:

A. Engagement with followers

B. Posting consistently

C. A catchy tagline.

7. Start a Podcast:

In search of getting brand awareness, the more value you’ll increase consumers’ lives, the more likely they’re will recall you, recommend you, and hopefully become customers for longer in future.

Creating a podcast doesn’t need to be as straightforward as just talking about your product or service, or commenting on the industry that you’re in––get creative. Are you a fitness company? Interview athletes making a difference in their communities. Are you a beauty brand? Dive into the logic behind creating different serums, hair care items, or makeup.

Consider which areas your team could also be experts in, or outside experts you’ll leverage, and make a bit of content that not only adds value to listeners’ lives, but when branded correctly, can work amazing for your brand awareness.

Brand awareness is a powerful concept which will have an effective influence on your marketing efforts, consumer perception, value to your brand and revenue.

Closure –

Follow these techniques for establishing and building awareness for your brand, and you’ll end up with a loyal audience that recognizes your brand among competitors, chooses your products time and time again, and recommends their friends and family do an equivalent.

How to Start a Blog in 2021

7 Easy Steps to Start a Blog

Are you trying to find a simple guide on how to start a blog? Starting a blog can feel overwhelming. But the reality is, it’s doable for anyone with the proper guidance. This guide will help you to learn how to start a blog in less than an hour. This guide is made especially for beginners.

One of the misconceptions about starting a blog is that you simply need to be a superb writer to realize success. Nothing could be further from the truth. People read blog sites to desire a personal perspective on things, so most bloggers write in a really informal and conversational style. You don’t get to be an expert on any of the topics you write on to possess a successful blog.

The process is simple to follow whether you’re 20 years old or 60 years old. Let’s discuss 7 steps to start your own blog without any technical knowledge.

Step 1. Select Niche for your Blog

Choosing your blog’s topic determines the remainder of the website’s future. This is what you’re getting to be writing about and — hopefully — making money from. Hobbies or other interests you’re enthusiastic to are a superb place to start out. Cooking, travel, fashion, sports, and cars are all superior examples. Blogs about more obscure hobbies are often successful, since your audience is literally anyone within the planet with the online.

Make sure to select a distinct segment that you simply are the foremost interested in—the one you’re hooked in to. You need to form sure a distinct segment has enough audience interest—topics people checking out.

Step 2. Choose a Domain Name

Your domain is going to be the name by which you’ll be known online. It’s your blog’s unique address on the Internet.

Users who know your domain can simply type it into their browser’s address bar. Others are going to be ready to discover you thru search engines like Google and Bing, so you actually got to find a singular blog name.

Your domain name may be the highly popular extensions like “.com”, or it may be country or niche-specific. The general rule is to get a “.com” domain, but some of the other extensions can be used too. For example, “.net” or “. blog”.

If you can’t find a domain name you like, GoDaddy is the most popular site for choosing a domain. Take time to try to do some research and thinking before you begin your blog.

Step 3. Get a Web Hosting

After choosing a website name, selecting a reliable hosting service is going to be one among the foremost important decisions you made.

A web hosting is a service provider that offers server space to host your website. This is where your website goes “lives.”

Bluehost is one of the eldest web hosting service provider companies on the internet. They are also the most important name when it involves WordPress hosting because they host many websites including many of their own.

Step 4. Install the WordPress Blogging Platform

Your website needs a content management system (CMS). This allows you to make and manage blog posts.

There’s only one option for this: WordPress.

Seriously, just use WordPress.

Reasons why you should choose WordPress only

1. Super easy set-up and is liberal to use

2. plenty of free themes and layouts (I’m not kidding, there are gazillions).

3. There’s a huge support forum just in case you grind to a halt (you won’t, but it’s nice to possess it there if you would like it).

4. Your blog is going to be insanely fast and it’ll also look Functionality and form – perfect!

5. People can interact with you easily. Your content is often shared, commented on, and so on.

Step 5. Choose a Theme and Design your Blog

A theme allows you to pick a design for your blog without the needfulness for coding or design knowledge. In the WordPress dashboard, under the “Appearance” tab, click “Themes”. You will be presented with some popular options. You can click on the WordPress.org Themes button and look for free themes. There are more than three thousand themes accessible on WordPress.org.

Changing your theme is the easiest method to customize your WordPress blog, but there are many other customizations you’ll do.

The easiest thanks to make changes is with plugins. Plugins are little batches of software you’ll install within WordPress to urge extra functionality. This is how you’ll add a bunch of additional features to your site without having to code anything yourself.

Step 6. Creating Your First Blog Post

To start writing a blog post, click on the Posts then Add New menu in your WordPress dashboard.

You will see an editor area where you’ll start writing your first blog post. If you’d desire to feature a picture to your post, click on the “Add Image” icon and click on “Upload” to upload an image from your computer. You can make adjustments to the image size on subsequent screens. When you are done click “Insert into post” to feature the image.

Each post should be lengthy, informative, and engaging. Create an eye-catching post title that stimulates curiosity and encourages clicks. Use the primary paragraph of your post to obviously define the subject of your article and supply a possible hook to stay the reader reading.

Once you have finished writing, go ahead and click on the Publish button on the top-right corner of the screen to make your blog post publicly available.

Step 7. Optimize your blog content for SEO

Search engine optimization (SEO) is the process that website owners use to urge more traffic to their sites from search engines (such as Google).

Add two key blogging plugins to hunt out your readers and track stats

• Yoast SEO is the defacto standard SEO plugin most popularly used for WordPress. 

• Google Analytics for WordPress by MonsterInsights permits you to track your blog’s traffic more easily and with lots of interesting data like overall traffic, traffic sources, views per author & category, automatic tracking of impression, clicks and pageviews.

Conclusion

Congratulations! You’ve learned how to start a blog. You have your own domain name; hosting space and your blog is published. Post content regularly. Create an editorial calendar and stick to it. A good blogger posts at least once per. If you’ve got a long gap between posts, your followers will drop off and your growth is going to be severely hampered. It’s difficult to post on a schedule, but it’s something you absolutely must stick with.

To Hire Top Rated Content Writers Click here

What is UX (User Experience) and Why it is Important?

Methods of the UX Process

UX (User Experience) is very important for most of the company, in almost every market, whether you’re launching an app or highly interactive website, UX could also be a key aspect of providing flawless user experiences. UX, once a distinct segment concern, has officially gone mainstream.

User Experience (UX) is an approach that allows your users to interface your website or app without confusion and with ease, providing a smooth experience of your brand. It combines elements of design, psychology, research, technology and business to supply the simplest experience for the user.

The importance of UX shouldn’t be underestimated. Around 30% of individuals won’t return to a site after a nasty User Experience which number will only go up as UX becomes more prevalent. Whether you’re a multinational organisation with a long-time presence or a startup creating your first website, User Experience must be a crucial thing about your design process.

Let’s differentiate between UX and UI-

UX vs UI are often misunderstood, even by industry professionals and thus the lines are often blurred. Then, how can we differentiate between User Experience (UX) and interface (UI)? To be more elaborate, UX is how someone feels about your design, their thoughts and emotions whereas UI is how they interact with it, its features and functions.

Many people view it as UX vs UI but in reality, it’s UX & UI. They are related, not opposing. UX is described as a folks-first way of designing whereas UI is feature-first. 

UI includes the look, feel, responsiveness and interactivity of a brand. A recent UX trend you’d possibly not even notice is UX and UI centric is dark mode or themes, which are designed both for look and functionality (UX and UI).

Methods of the UX Process

There are a variety of steps to travel through when developing user experience. Here are 7 basic steps to start with:

1. User Profiles and Personas

The first step within the process is going to know your audience. This allows you to evolve experiences that relate to the voice and feelings of your users. To start this, you’ll want to make a user persona, which may be a semi-fictional representation of your ideal customer supported marketing research and data on your existing audience.

When you finish developing your user persona (or personas), you’ll have the profile of the person(s) your site entertains. Creating a persona consists of diving into your site’s statistics and other customer data while also conducting internal and external interviews and surveys. You can even ask “look-alike” audiences that reflect an equivalent trait as your current users.

2. Interface Testing

When you’re building an interface, the more data you’ll collect, the higher. Arrange a study to match the effectiveness and quality of experience between different user interfaces, including your current site. Something as minor as changing one word could impact the effectiveness of your page.

One most powerful tool for interface testing is Google’s Optimize platform. With Optimize, you’ll split your website impressions into two groups and show each of those groups a special version of pages on your site. Once you’ve got a statistically significant sample size, you’ll see which version is outperforming the opposite and make adjustments accordingly.

3. User Surveys

Interview existing and potential users of the system to realize insight into what would be the foremost effective design. Because the user’s experience is subjective, the simplest way to directly obtain information is by studying and interacting with users. An element on the page that you simply thought was working might sound completely invisible to the user, so a first-hand view of the way they interact with the web site can provide valuable insights.

4. User Flow Diagram

Make a flowchart revealing how users should move through a system. Start by deciding how you expect them to maneuverer through the location, then compare it to how they really interact with it. User personas will assist you here — once you understand the profile of the user on your site, you’ll better plan the optimal experience for them.

5. Sitemaps

Once you’ve studied the user flow visitors expect on your site, thorough planning is important. Start by building a sitemap for the pages you’d wish to create. A sitemap could also be a clearly organized hierarchy of all the pages and subpages within your site.

Creating a sitemap makes it easier to imagine how a user will get from point A to point B on the online site, and therefore the way many clicks it’ll fancy roll in the hay. Rather than implementing structural changes once the location is made, a sitemap helps your team eliminate bad ideas early while simultaneously showing you all the pages you’ll eventually need to design and write content for. It is an efficient tool for adding efficiency to the web site building process.6. Wireframes and prototypes

The visuals on each page matter whilst considerably just like the location structure, so invest time into creating wireframes, which are visual guides that represent the skeletal framework of web pages and supply a preview of your site’s look and feel. With a visible website framework in situ, you’ll eliminate usability issues before any page hits a display screen. This can save your company development time for necessary adjustments down the road.

6. Design Patterns

Patterns provide consistency and how of finding the foremost effective design for the work. With interface design patterns, for instance, picking the proper interface (UI) elements (e.g., module tabs, breadcrumbs, slideshows) surely supports their effectiveness results in better and more familiar experiences.

One tool that helps us manage UI consistency is style tiles. Style tiles are deliverables that show the planning of all modules on a site, right down to font sizes and colours. This document includes things like buttons, layout type, and even interactivity. Style tiles ensure a user will have a smooth experience across the whole site so they’ll be ready to better recognize the way to interact with the site’s elements.

7. Style Guides

Consistency is condemned to designing a memorable user experience through a brand. Style guides give writers and designers a framework during which to figure when creating content and building a design, and that they also make sure that the brand and style elements align with the owner’s goals.

Making your style guide is definitely accessible to anyone performing on a replacement website. One element on a page that doesn’t match up together with your brand’s image or voice can stick out as a sore thumb. If you don’t have a method guide, considering building one. You will get surprise how useful it’ll be, even beyond designing your site’s UX!

Conclusion

The world of UX design is vast and sophisticated, but with the proper expert’s assistance you can revolutionize your website, design and business. Smart designers know the importance of developing winning UX and UI.

Also Read Blog – The Principles of Website Usability

Advantages of GST for Startups

Benefits of GST for Startups and Small Businesses

The implementation of the Goods and Services Tax (GST) in India has enormously influenced the way startups function. GST has terminated some indirect taxes and combined everything under its own larger umbrella. It was introduced with a slogan of “One Nation One Tax” to ease compliance plans for businesses and specially for startups.

With the implementation of GST in India, the procedure for GST registration became centralised and also standardised. It shall remain almost like the service tax registration. Under the GST regime, the business would not need to obtain multiple VAT registration. As a single GST registration applies across India. Therefore, the procedure for getting GST registration would also become standardised. Thereby improving the convenience of starting a replacement business in India with none difficulties.

GST for startups: All you would like to understand before you register

The entire GST registration process takes place online, saving you the effort of running from one office to a different one.

Here’s a checklist of all documents required for GST registration for startups:

  1. Company Pan card
  2. The Ministry of Corporate Affairs incorporation certificate
  3.  Memorandum/Articles of association
  4. Signatory’s appointment proof
  5. Signatory’s PAN card
  6. A Signatory’s Aadhaar card
  7. PAN card & address proofs of enlist directors
  8.  Address proof for place of business (copies of lease agreement/ latest electricity bill/property tax receipt)
  9. Proof of checking account (scanned copy of the primary page of bank passbook/bank statement/cancelled cheque

While the products and Services Tax (GST) is predicted to facilitate that growth, not all aspects of the new tax regime are startups-friendly. Let’s take a glance at how GST has impacted startups

1. Higher threshold for GST registration

Before the implementation of GST, any business with a turnover of quite Rs 5 lakh during a fiscal year was required to get VAT registration. However, any business whose turnover exceeds Rs 40 lakh during a financial year is required to register under GST. This limit is Rs 20 lakh for service providers like freelancers.

This higher threshold under GST has brought compliance relaxation to many startups in India, including small business. 

2. Enjoy tax credit

A lot of startups in India are a neighbourhood of the industry. Prior to GST, they had to gather and pay service tax to the govt. Non-utilisation of the VAT paid on purchases made for business basis was one among the first concerns. There was no provision for claiming the credit of state VAT paid against the service accountability.

Since GST has brought several indirect taxes under its umbrella, the matter has been resolved now. Startups can withdraw tax paid on the purchases (for example office supplies) with the tax paid on their sales under GST.

3. Ease of running business

GST, there will be one single registration and less paper work. The business owners would now be ready to focus their energy in completing productive business operations instead of complying with complicated tax laws.

4. Expansion of business

Most small businesses restrict their business operations to at least one state thanks to inter-state taxes and sophisticated tax procedures. This limits their customer stand to the state where they’re located. GST will simplify the inter-state tax complications, reducing the value of supplying goods across states. This will inspire business owners to expand business Pan India; thus, increasing their customer base.

5. Reduced tax burden

Under the present scenario, businesses with turnover of but Rs. 5 lakhs don’t need to pay the VAT registration fee. This limit has been increased to Rs. 20 lakhs under the proposed GST bill. This will reduce the tax burden on the SMEs.

6. Cascading of taxes has been eliminated

Since GST was implement to bring all the indirect taxes under one umbrella, the sooner hassle of tax cascading (or tax on tax) has been eliminated. This translates to more direct savings for little businesses.

7. Online compliance processes

It has become extremely easy for little business owners to file their returns with the introduction of a web portal. A centralised digital system means they do not have to register separately with different tax entities and undergo the effort of navigating through manual workflows.

8. Easier Invoicing

Invoicing becomes easier because the tax apply uniformly and there’ll be no distinction between goods and services thereby reducing evasion and cash in of varied tax incentives.

9. Reduction in Transportation and Logistics Cost

Before the new GST regime, the state governments have applied their own different tax structure when it came to Octroi and CST applicability for interstate transportation of products. Therefore, the implementation of GST is often considered as a conquest by the central government in India and a welcome move for startups.

Conclusion

GST may be a pivotal reform, not just for startups, but major corporations also. The implementation of GST ensures that startups have a neater experience with tax compliance than under the previous regime, which they enjoy additional benefits, like smoother movement of products. Both of those benefits release tight budgets for operations and performance of services.

 To get more information about GST for Freelancers visit GST for Freelancers and Bloggers

GST For Freelancers and Bloggers

Guide on GST for Freelancers

GST is applicable in India from 1st July 2017. It is also applicable to Bloggers, YouTubers, Service Providers and each one other kinds of Freelancers. The rate of GST in such cases is 18%. There is no doubt regarding this and it’s fairly clear that GST @ 18% is applicable on all Service Providers, Bloggers, YouTubers, affiliate marketers and other freelancers.

However, GST Registration will be necessary in such cases (if the whole value of services provided is sort of Rs. 20 Lakhs during the year) and Return filing & all other compliance would even be required to be followed.

Bloggers could also be a replacement profession in India a bit like the Doctors or Engineers. GST also is going to be payable by bloggers, affiliate marketers, YouTubers, and other freelancers at the rate of 18% of the whole revenue generated.

A GST of 18% has been applicable to be levied on services like marketing, blogging and more freelancing services when the services provided are within the economic boundaries of India. The tax will have to be collected from respective clients and deposited to the govt. of India.

If the supplier and thus the client are both from the same state, the classification of GST is getting to be as follows:

1. CGST @ 9%

2. SGST @ 9%

The overall tax paid is getting to be the same, i.e., 18%, but it’ll be paid to Central and government separately.

Your invoices must be clear to show your business Name, Address, Invoice Date and your GST number, your client’s GST number (if B2B service), GST amount and total amount.

Why do Bloggers or YouTubers come under GST?

YouTubers and bloggers represent the service induced liabilities under the GST Bill. A blogger comes under consideration as a supplier of services. Bloggers offer a platform to the advertisers to dispose of their advertisement.

Freelancers who are bloggers, app and web developers, content writers, etc. They have been exempted from registration under GST if their annual turnover is up to Rs 20 lakhs albeit making the interstate supply. Before this relief, GST registration was mandatory for a private who was providing services outside the state no matter their turnover.

This has an enormous impact on the small scale Bloggers and to other service providers which were mandatory to register for GST. A small- scale freelancer who was earning about 100,000 rupees once a year can’t hire a CA who will charge thousands of rupees to remain GST compliant. This burden of registration has been removed and now they have to register only their annual turnover is above Rs. 20 lakhs.

Export income remains exempted from the GST

Export income for online entrepreneurs means if you receive any income comes from a faraway registered company. In most of the cases, export income comes through PayPal from the clients.

AdSense income, Affiliate Income from Foreign registered company, Freelance income from PayPal is taken under consideration as export income.

Let’s Discuss some service provider who required to Register for GST

Freelancers: If you are a contract writer, designer, developer or digital marketer who is providing services of quite 20L annually.

Bloggers: You’ve to pay GST, if you are making online income through blogging. Because whom you provided sponsored articles, will have income from advertisements or getting a commission as an affiliate.

Affiliate Marketers: If your income comes from any affiliate marketing network based in India like Amazon or flipkart, then you’ve to pay GST.

YouTubers: Same as bloggers, Youtubers even need to register for GST if their annual income is sort of 20L.

Digital Marketers: You furthermore may have to return under GST if your business is above 20L once a year.

Perk of GST

You will get a benefit of the GST amount that you simply pay on your business expenses. GST on expenses is will be adjust in your GST returns against the GST that you simply pay on your business income.

What is the GST Registration Process for Bloggers, YouTubers?

The GST official portal is GST registration. This registration requires the business information, personal details, Details of the Business property.

If you’re unsure whether your yearly income will reach the bar of 20 lakh once a year or not, you’ll still charge GST from your clients. Just in case your income doesn’t reach Rs. 20 lakhs at the highest of the year, the GST you charge from your customers will be credit back to your clients.

Conclusion

It is highly mandatory for the bloggers, YouTubers, Affiliate Marketers to register for GST and send out their GST on time by generating GST invoices. Doing so will keep you safe from any risks like the penalty of not paying the tax.

For more details Read Simplest Guide to GST for Freelancers in India